
This post may contain affiliate links. If you purchase through one of these links, I may earn a small commission at no extra cost to you.
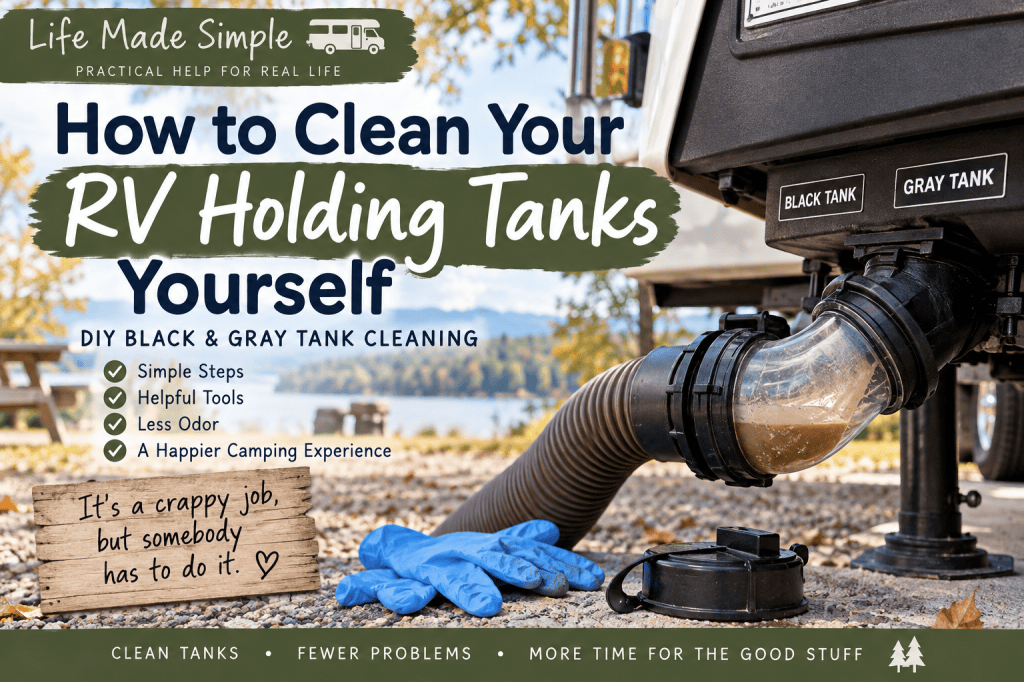
It’s a crappy job, but somebody has to do it.
Nobody buys an RV because they’re excited about maintaining a sewage tank.
Unfortunately, your black and gray tanks are two of those things that are much easier to deal with before something goes wrong. A tank that won’t drain properly, lingering odors, or sensors that swear the tank is full five minutes after you emptied it can turn a pleasant camping trip into a very different kind of adventure.
We’ve lived full-time in our RV for years, and ours happens to be a 1992 Monaco. That means we don’t have every newer convenience, including a built-in black-tank flush.
We have had our tanks professionally cleaned before, but that isn’t always a realistic option. Sometimes there isn’t anyone nearby. Sometimes the cost just isn’t in the budget.
The good news is that RV owners can do quite a bit themselves.
The Most Important Thing Your RV Holding Tanks Need Is Water
Before we get into gadgets, cleaners, and flushing methods, this is the part that matters most:
Use enough water.
Your black tank does not work like the plumbing in your house. Waste doesn’t travel immediately through a sewer line every time you flush. It sits in a holding tank until you dump it.
That means you need enough liquid in the tank to keep waste from accumulating on the bottom and enough volume when you dump to help carry everything out.
Kleen Tank recommends waiting until your holding tanks are about 75% full or more before dumping. If you need to dump sooner, add fresh water first. The volume of liquid helps create a stronger flow when the valve is opened.
And this is why you generally do not want to leave your black-tank valve open while you’re connected to a sewer hookup.
The liquid can drain away while the solids remain behind.
That is how you begin construction of the dreaded poop pyramid.
We will not be adding that attraction to the campground brochure.
What You’ll Need
You do not need a garage full of specialized equipment.
Depending on your RV setup, these are the things I would have on hand:
- Disposable gloves
- Your normal sewer hose and fittings
- A clear sewer elbow or clear sewer-hose adapter
- A dedicated non-potable-water hose
- A toilet rinse wand, if you have reasonably direct access to the black tank through the toilet
- An external reverse-flush valve, if you want another flushing option
- Plenty of fresh water
- Your preferred holding-tank treatment for afterward
The clear sewer fitting is especially useful.
Without it, you really have no way of knowing whether your rinse water is getting cleaner or whether you’re simply dumping another tank full of questionable soup.
Sometimes ignorance is bliss.
This is not one of those times.
Step 1: Let the Tank Fill Before You Dump
If your black tank is already close to full, you’re ready to go.
If it isn’t, add fresh water through the toilet until you’ve raised the level substantially.
Do the same with the gray tank through your sinks or shower if necessary.
Kleen Tank recommends dumping tanks when they are roughly three-quarters full to full, rather than repeatedly dumping partially filled tanks.
If you are camping with full hookups, this can feel backward at first. You’re connected to a sewer, so why wouldn’t you just leave everything open?
Because your holding tanks actually work better when the liquid is allowed to accumulate.
Step 2: Dump the Black Tank
Make sure your sewer connections are secure.
I cannot emphasize that particular sentence enough.
Open the black-tank valve and let the tank drain completely.
If you are using a clear sewer fitting, you will be able to see when the main flow has stopped.
Then close the valve.
Step 3: Rinse the Black Tank
This is where your method depends on what your RV has.
If You Have a Built-In Black-Tank Flush
Use it according to the instructions for your RV.
The extra water and turbulence help move remaining material toward the drain. Kleen Tank recommends using a tank flush during the dumping process when one is available.
If You Don’t Have a Built-In Tank Flush
Welcome to our club.
You still have options.
Option 1: Use a Toilet Rinse Wand
If you have reasonably direct access to the black tank through your toilet, an RV tank-rinse wand is one of the simplest DIY tools.
The wand attaches to a dedicated water hose and is lowered through the toilet opening so you can spray water into the tank.
Use a hose reserved for waste-system maintenance. Do not use the hose that supplies your drinking water.
Depending on the wand design, the spray can help loosen debris from different areas of the tank while the waste valve is open and the loosened material drains away.
Option 2: Use an External Reverse-Flush Valve
A reverse-flush device attaches at your RV’s sewer outlet and allows fresh water to travel backward through the drain line toward the tank.
Kleen Tank specifically recommends devices such as the Valterra Flush King as an option for flushing both black and gray tanks when a built-in system isn’t available.
Follow the manufacturer’s directions carefully.
And if you are adding water to a tank while its waste valve is closed, stay right there with it.
Do not turn on the water and wander off to rearrange the campsite.
An overflowing black tank is the sort of mistake that gets remembered by everybody.
Step 4: Fill, Dump, and Repeat
Even if you do not own a rinse wand or reverse-flush device, repeated water rinses can still help tremendously.
After your initial dump:
- Close the black-tank valve.
- Add a substantial amount of fresh water through the toilet.
- Open the valve and dump again.
- Watch the water through the clear sewer fitting.
- Repeat until the discharge is considerably cleaner.
You don’t need the water coming out of a waste tank to look suitable for bottling.
We’re aiming for much cleaner, not mountain spring.
Water and repeated flushing are doing most of the work here.
Don’t Forget the Gray Tank
The black tank gets all the attention for obvious reasons, but your gray tank deserves some love too.
Gray water can contain:
- Soap residue
- Body oils
- Hair
- Food particles
- Cooking grease
- Toothpaste
- Various other things we send down a sink without giving them another thought
That buildup can contribute to odors, sluggish draining, and inaccurate tank sensors.
Fill the gray tank substantially with clean water and dump it.
If you have an external reverse-flush device that is designed for use with both tanks, you can also use it to help rinse the gray tank. Kleen Tank specifically notes that this type of device can be used on both black and gray holding tanks.
What If Your Tank Needs More Than a Rinse?
Sometimes you’re dealing with more than routine maintenance.
Maybe you’ve inherited years of buildup from a previous owner. Maybe your tank sensors haven’t told the truth since the Bush administration. Maybe there is an odor that absolutely refuses to leave.
A holding-tank cleaning product can be useful for an occasional deeper cleaning.
For example, Thetford’s Tank Blaster is made for both black and gray tanks and is designed to help remove waste, grease, deposits, and buildup around tank sensors. The manufacturer recommends leaving it in the tank overnight for the best results.
That’s different from the treatment you add after ordinary dumping.
Think of one as periodic cleaning and the other as routine maintenance.
And follow the directions on whatever cleaner you choose rather than creating your own chemical cocktail.
The holding tank does not need a chemistry experiment.
After Cleaning, Put Water Back In
This is one of the easiest steps to overlook.
You finally get the tank empty and clean, so leaving it empty sounds logical.
But if you’re continuing to use the RV, you actually want some fresh water sitting in the bottom of the tank.
Kleen Tank calls this priming the system and recommends adding about 3 to 5 gallons of clean water, depending on tank size, after dumping.
That gives new waste some liquid to land in instead of allowing it to collect on a dry tank floor.
It also helps maintain a better liquid-to-solid ratio as you begin filling the tank again.
Simple step. Big difference.
The Holding-Tank Treatment We Use
When we had our RV tanks professionally cleaned, the technician left us a refrigerator magnet with a simple homemade holding-tank treatment.
It uses:
- Pine-Sol
- Calgon bath beads
- Water
This isn’t what actually performs the deep cleaning.
The cleaning comes from water and flushing.
The solution is used afterward as an ongoing tank treatment.
The instructions left with us recommend using 4 to 8 ounces of the finished solution in a holding tank after dumping.
I’ve made a printable version because nobody wants to stand outside beside a sewer connection trying to remember how much Calgon went into what.
Print the RV Holding Tank Treatment Recipe
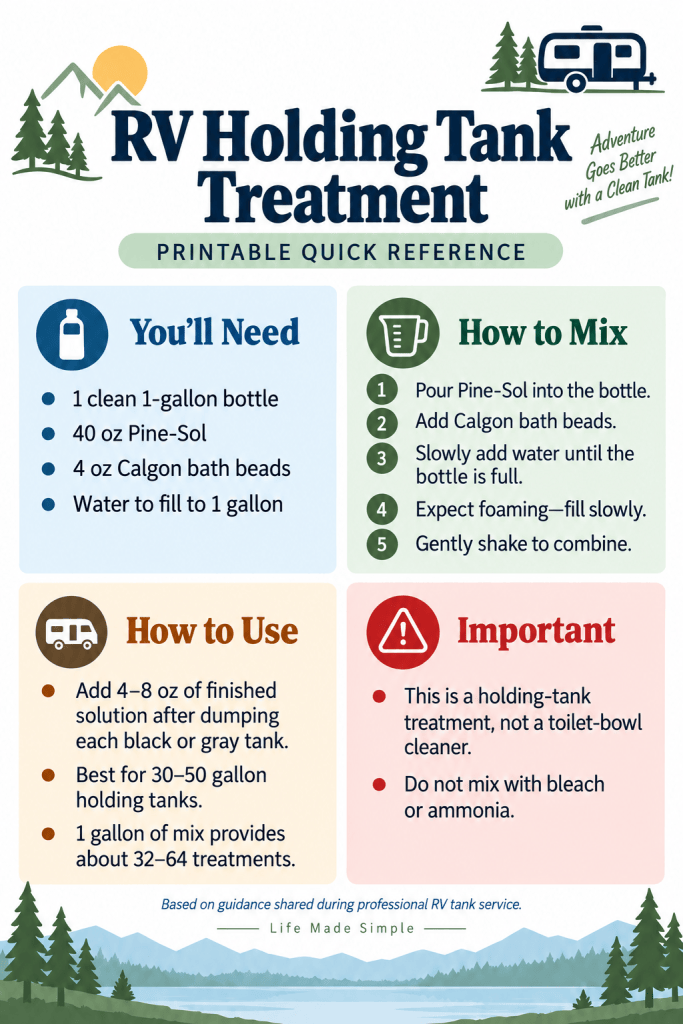
Click here to open the printable RV Holding Tank Treatment Recipe.
You can print the card and keep it with your RV supplies so you have the recipe handy when you need it.
One Note About the Recipe
Kleen Tank has published more than one version of this mixture over the years.
Their current online recipe calls for:
- 40 ounces of Pine-Sol
- 8 ounces of Calgon bath beads
- Water to make one gallon
- 1/2 cup of finished solution added to each tank after dumping
The instructions left with us after our tank service state that 4 to 8 ounces of finished solution may be used.
So if you find slightly different measurements online, you aren’t imagining things.
For the printable, I’m using the directions that were provided to us by the technician who actually serviced our RV.
A Few Habits That Can Keep Your Tanks Cleaner
The easiest tank problem to fix is the one you never develop.
Keep the black and gray valves closed between dumps. Let the tanks accumulate enough liquid to create a good dumping flow. Kleen Tank recommends keeping both closed during normal use.
Use plenty of water when you flush the toilet. This is especially important when you’re sitting at a full-hookup site and aren’t worried about conserving freshwater.
Don’t dump tiny amounts repeatedly. If you need to empty the tank before it’s substantially full, add fresh water first.
Rinse periodically instead of waiting until something smells wrong.
Put 3 to 5 gallons of clean water back into the tank after dumping.
And don’t assume a tank sensor telling you FULL necessarily means the tank is full.
Residue can interfere with holding-tank sensors. Thetford even makes a dedicated level-gauge cleaner designed to remove sludge and soap buildup from black and gray tank sensors.
Sometimes your RV is not full.
Sometimes it is simply lying to you.
Can You Really Clean Your RV Holding Tanks Yourself?
For routine cleaning and maintenance, yes.
A professional high-pressure tank cleaning system can obviously do things an ordinary garden hose cannot, particularly if you are dealing with years of hardened buildup or a serious blockage.
But that’s different from saying RV owners need to hire somebody to maintain their tanks.
Most of us do a lot of our own RV maintenance because:
- It’s less expensive
- We need to understand how our own systems work
- A repair or service company may not be anywhere nearby
- Problems have an uncanny ability to happen on weekends
Ask any longtime RV owner how many things they have learned to fix that they never expected to know anything about.
Holding tanks just happen to be farther down the glamorous end of that list.
With plenty of water, the right dumping habits, periodic rinsing, and a little routine maintenance, you can do a great deal to keep your own black and gray tanks working properly.
It isn’t the prettiest part of RV life.
But neither is discovering your black tank has staged a rebellion.
Sources
For this article, I referenced Kleen Tank’s published guidance on holding-tank maintenance, flushing, and priming, along with Thetford’s manufacturer information on periodic tank and sensor cleaning.
 Life Made Simple
Leave a comment